Syncing Forms with Google Calendar
You can sync your forms with Google calendar. Google calendar syncing requires a Premium (or Boost) account. Calendar syncing will instantly sync new sign ups to a connected Google Calendar. Deleted sign ups are also synced and removed from connected Google calendars.
Sections in This Guide
1
Start on the Form Options page of your form.
2
Scroll down to the Google Calendar Sync section. Click 'Connect Google Calendar' and accept all permissions.
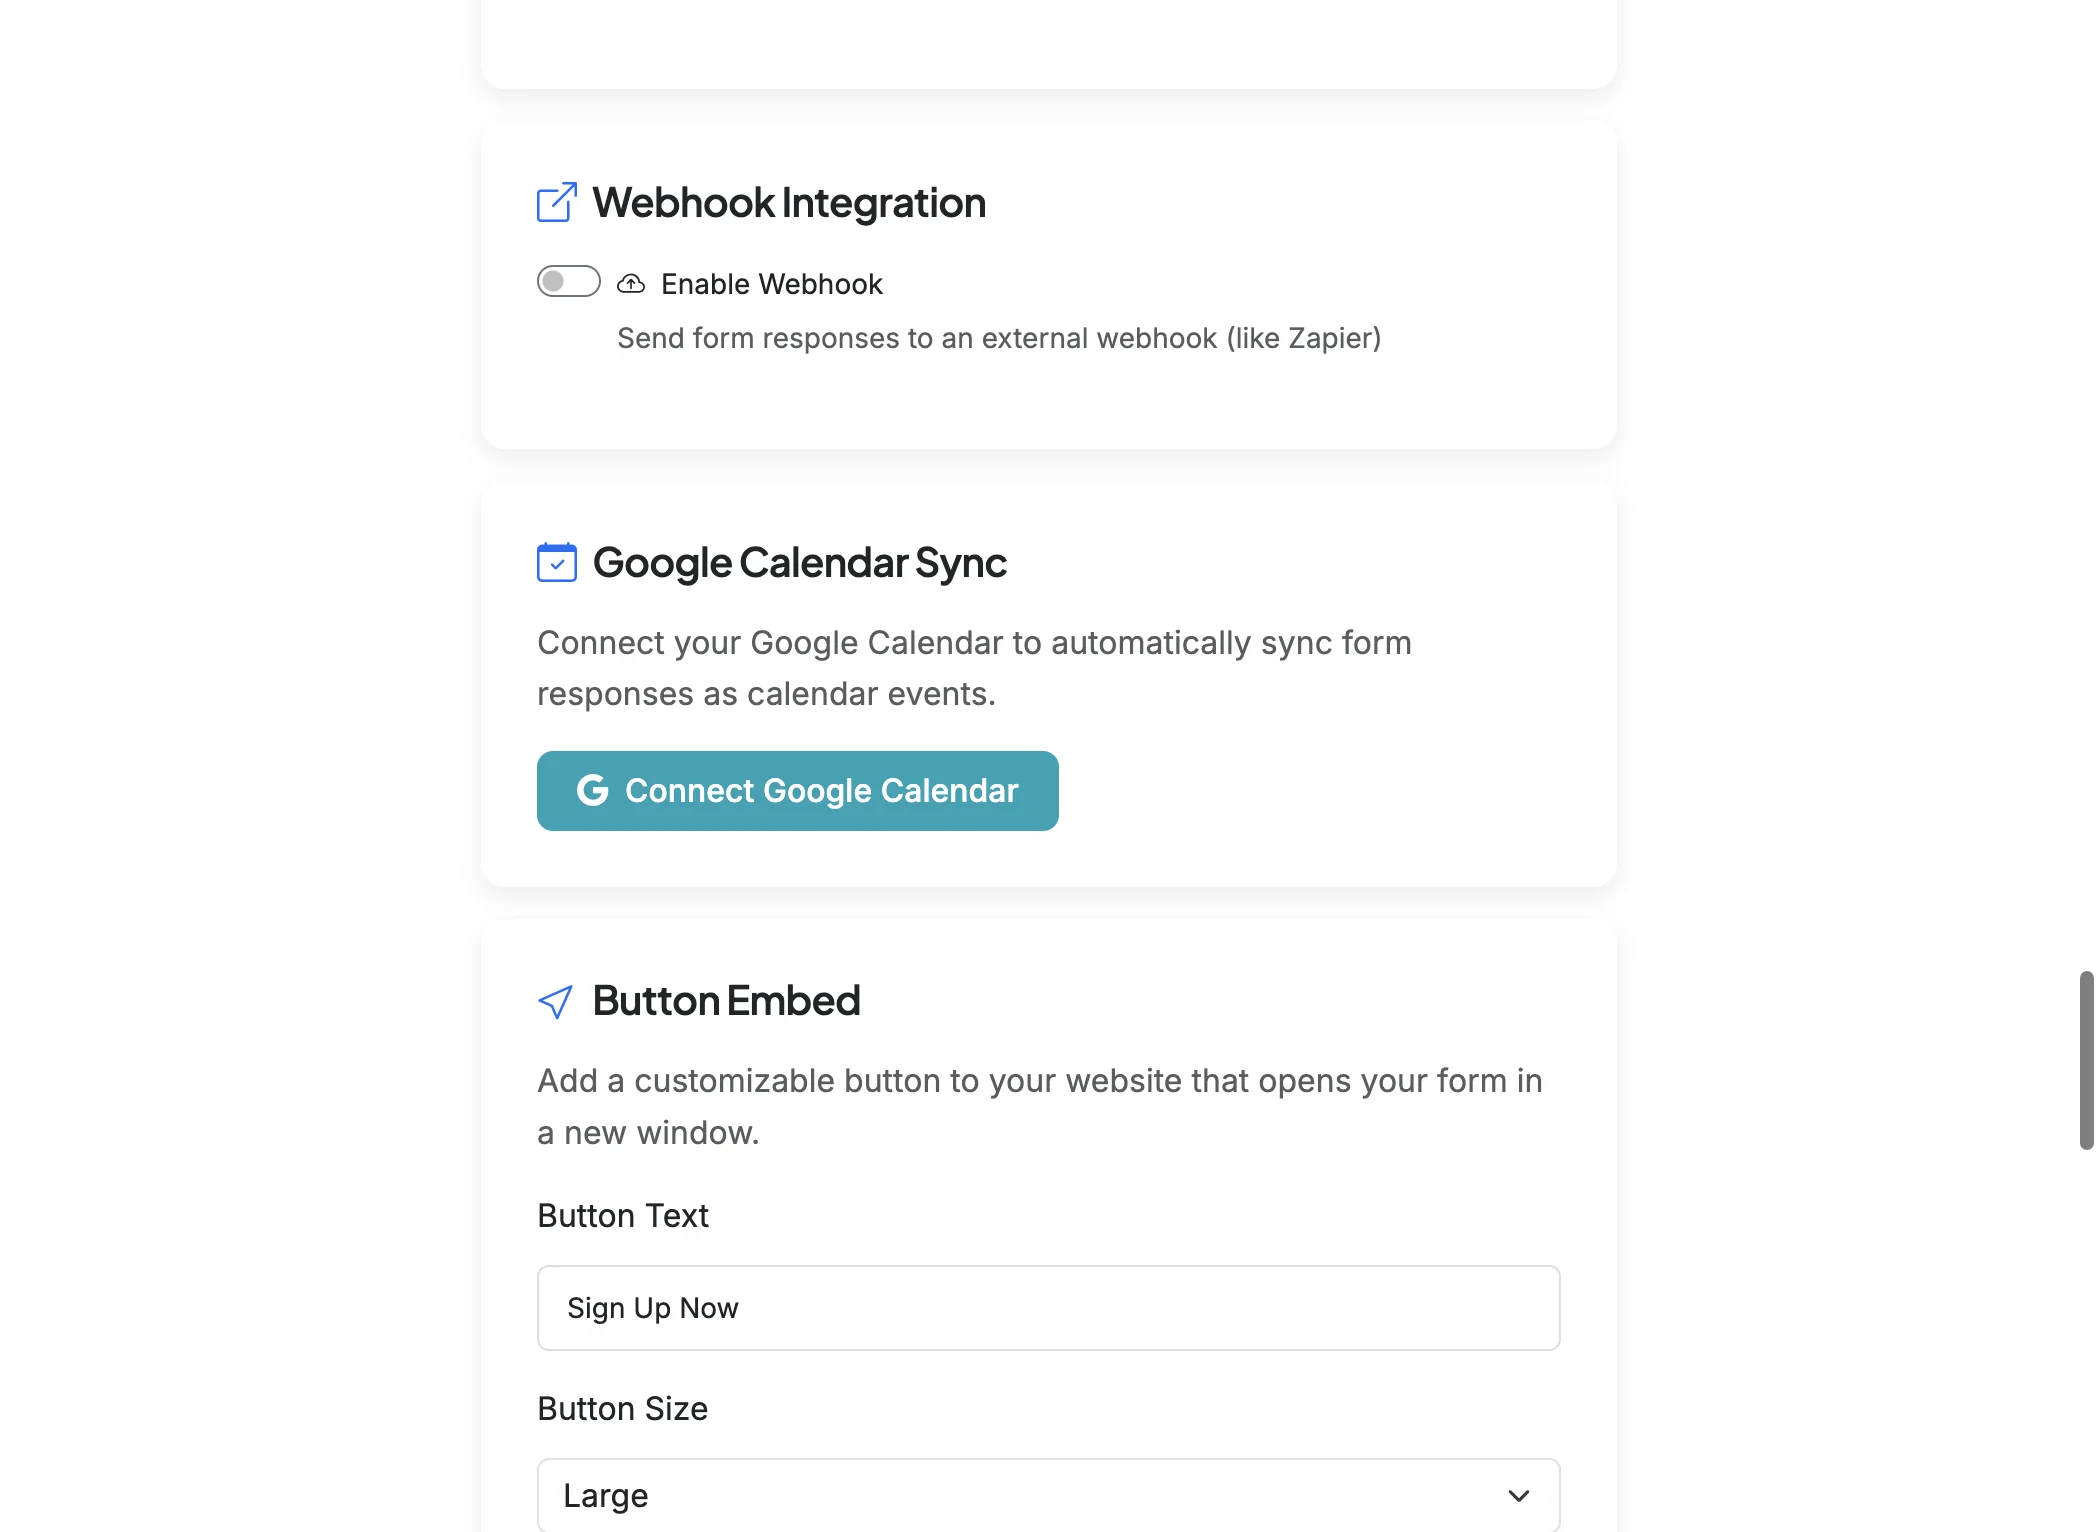
3
After you have connected a Google account with calendar permissions, you can 'Enable sync for this form'. This will enable syncing and open the configuration options.

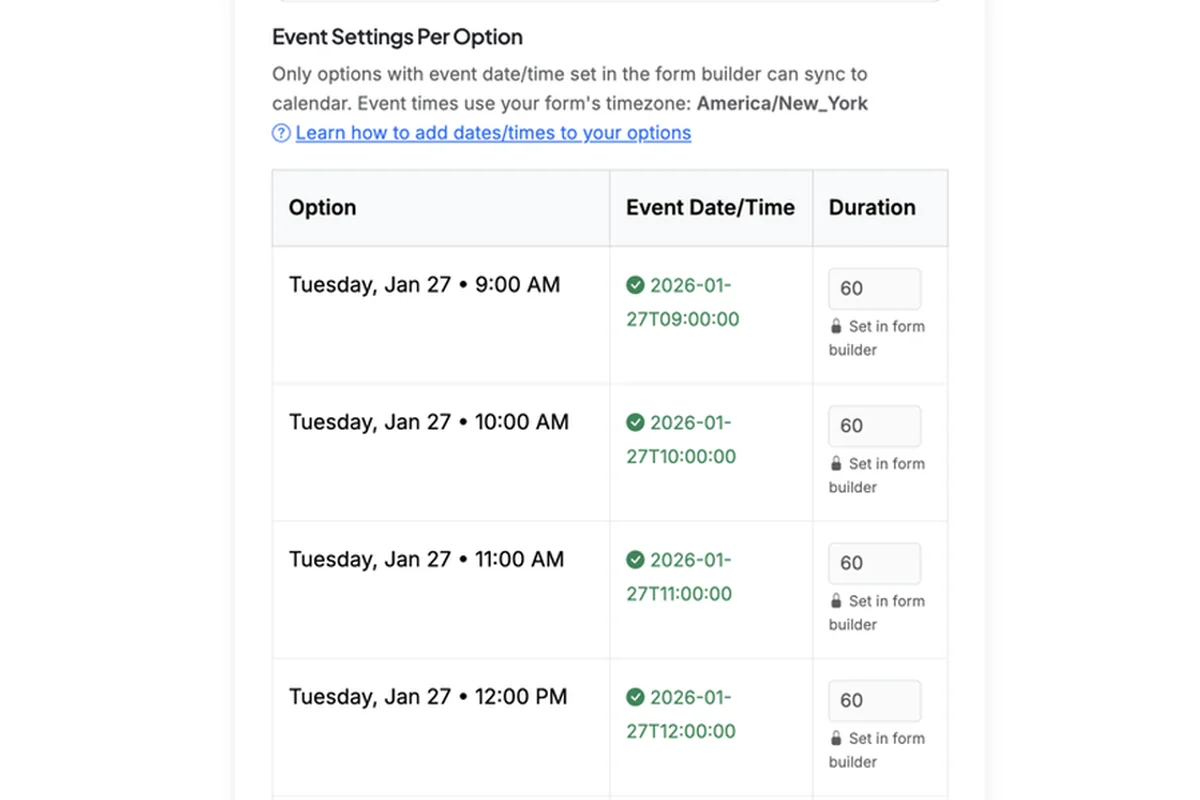
4
The most essential requirement for calendar syncing is that you have 'Assign Dates/Times to Options' enabled on your form (more info below). The Event Settings per option in the calendar sync setup will show you which options have dates/times set and will automatically pull in that information. You can adjust duration if it was not already set in the form.
ADDING DATES/TIMES TO FORM OPTIONS
1
Calendar syncing requires dates/times to be set on options to sync them. You can find this option on the Edit page for your form in Advanced Options.
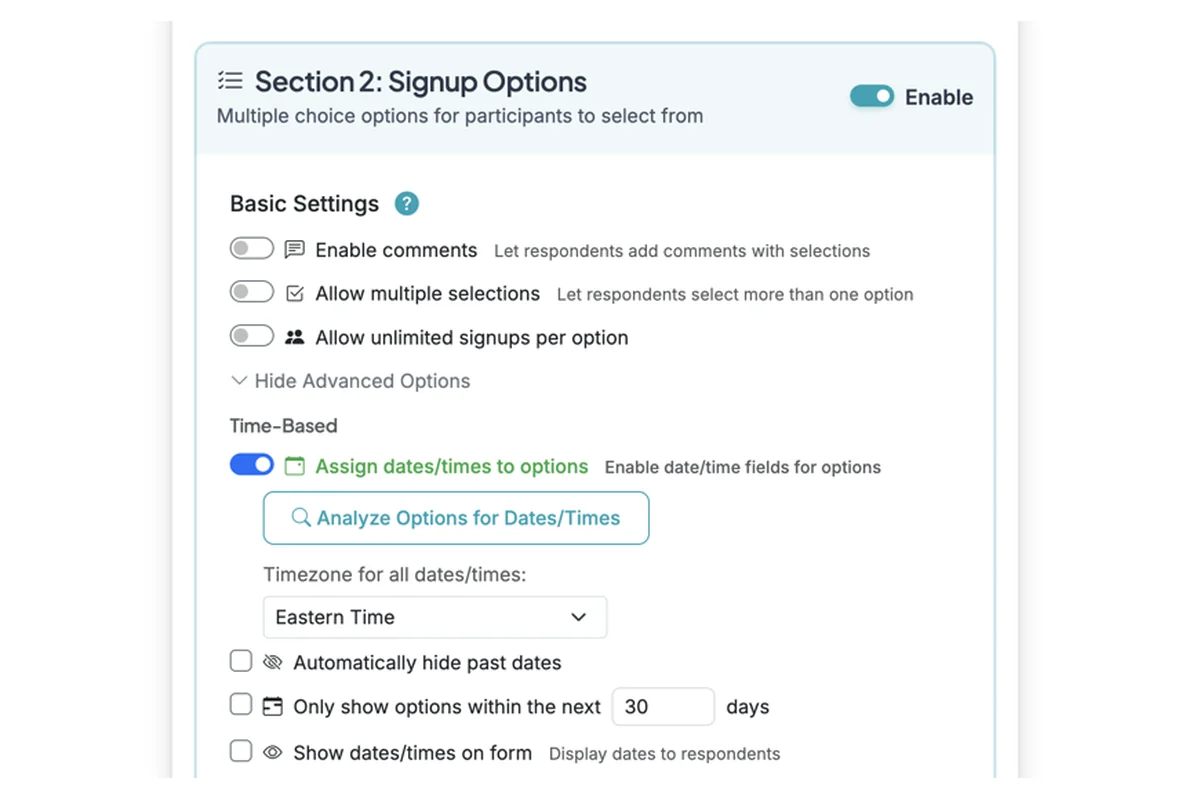
2
After you enable dates/times, you can have AI scan the form to try and parse dates times. You can also manually configure dates/times. Make sure to save dates/times and check them thoroughly. A teal calendar check mark will indicate that dates/times are saved.

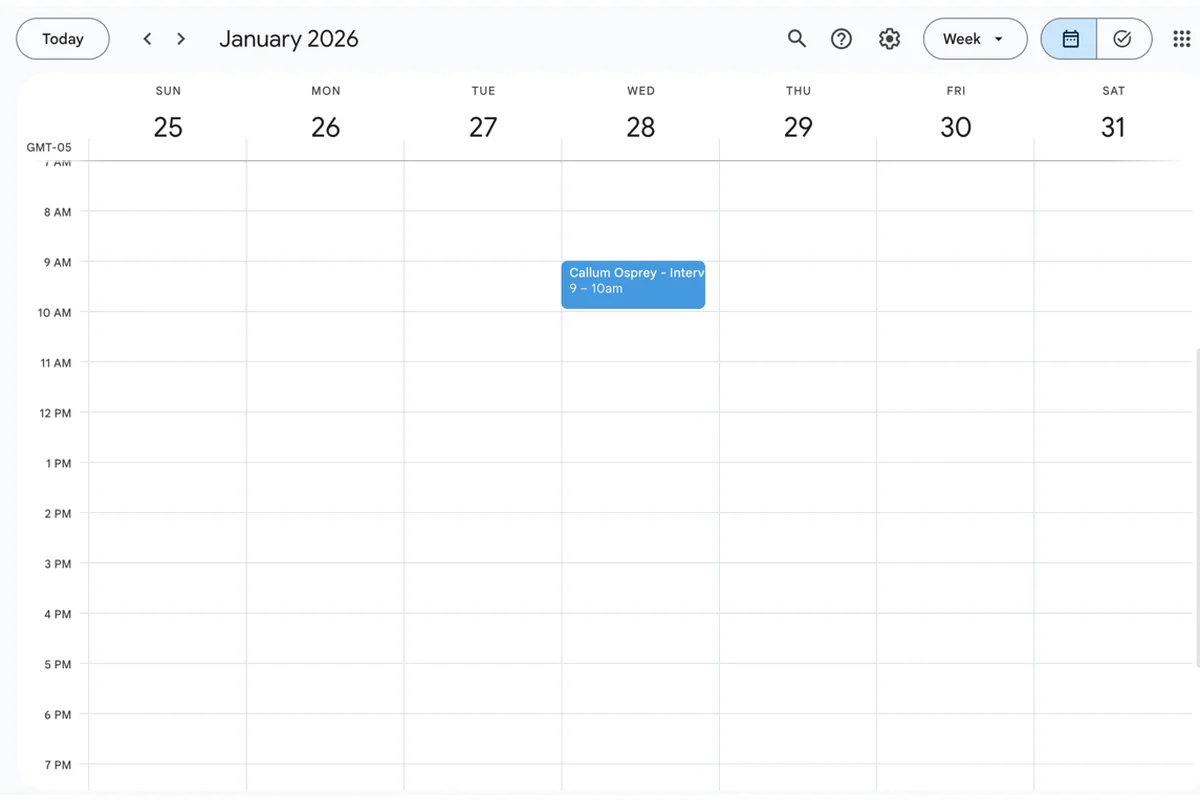
CALENDAR VIEW
1
When calendar sync is enabled and configured properly, any form sign up for an option that is syncing with a calendar will automatically (instantly) be added to the calendar.